If after repainting walls paint started bubbling, you’re definitely not alone. Homeowners commonly notice bubbling, blistering, or small raised spots on freshly painted walls — sometimes within hours, sometimes days later. This is very common after repainting and, in most cases, it’s not caused by “bad paint.”
Usually, bubbling paint is related to moisture, surface preparation, or drying conditions, not the paint brand itself. Understanding what’s happening underneath the paint helps you decide whether this is just a cosmetic issue or something that needs attention before repainting.
Why Paint Starts Bubbling After Repainting
Paint bubbling after repainting happens when something prevents the paint from bonding properly to the wall.
In simple terms, bubbles form because:
- moisture gets trapped under the paint
- air expands beneath the surface
- the paint dries too fast on the outside
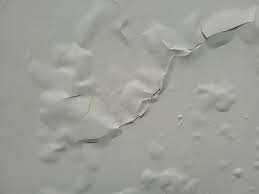
When paint can’t adhere evenly, it lifts away from the wall, creating bubbling paint on walls or blistered areas. No complex chemistry — just physics, moisture, and timing.
Is Bubbling Paint a Serious Problem?
In many homes, bubbling paint looks worse than it actually is — but not always.
Usually cosmetic
- small bubbles or blisters
- appear shortly after painting
- limited to one area
- no damp smell
Potential issue
- bubbles grow or spread
- appear days after painting
- wall feels cold or damp
- musty or влажный smell present
Painters often explain that timing matters: when bubbles appear tells you a lot about the cause.
Most Common Reasons This Happens
Moisture in the Wall or Surface
This is the #1 reason paint bubbling after repainting occurs.
Sources of moisture include:
- damp walls after leaks
- bathrooms or kitchens with poor ventilation
- freshly plastered or skim-coated walls
- walls cleaned with water shortly before painting
Even if the surface looks dry, moisture inside the wall can push outward as the paint cures.
Painting Over Damp or Dirty Walls
Paint needs a clean, dry surface to bond.
Problems include:
- dust or fine construction debris
- grease residue
- condensation on cool walls
Painting over these creates weak adhesion, leading to wall paint bubbling after drying.
Poor Surface Preparation
Homeowners often skip prep because the wall “looks fine.”
Common prep issues:
- no primer
- painting over flaking old paint
- uneven or chalky surfaces
Without proper preparation, the new paint layer can lift and blister.
Painting in High Humidity or Heat
Paint bubbling due to humidity is extremely common.
When conditions are wrong:
- paint skins over too fast
- moisture gets trapped underneath
- air expands before escaping
This is why paint blistering after painting often happens during hot, humid weather or in poorly ventilated rooms.
Incompatible Paint or Primer
Using incompatible layers can also cause bubbling:
- water-based paint over improperly sealed oil paint
- wrong primer for the surface
- repainting too soon between coats
In most cases, the paint doesn’t fail immediately — bubbles appear later.
What You Can Check Yourself (Safe Steps)
Before doing anything drastic, check a few things:
- Gently press a bubble
- soft or wet → moisture
- dry and hollow → air or adhesion issue
- Is bubbling localized or across the wall?
- Was the wall fully dry before painting?
- Was primer used?
- Is the room humid or poorly ventilated?
⚠️ Important:
- Don’t scrape the entire wall immediately
- Don’t repaint over bubbling paint
- Don’t assume the paint itself is defective
What NOT to Do
Avoid these common mistakes:
- ❌ Painting over bubbles to “hide” them
- ❌ Ignoring signs of moisture
- ❌ Using heaters or heat guns to force drying
- ❌ Sealing moisture under another coat
These actions often make the problem return — worse.
How Long After Painting Bubbling Can Appear
This is a key diagnostic clue.
Immediately or within minutes
- surface contamination
- painting on damp walls
- high humidity
After a few hours
- drying conditions
- trapped air or moisture
- poor ventilation
After several days
- hidden moisture inside the wall
- condensation issues
- slow moisture migration
Homeowners often notice delayed bubbling and assume something “went wrong later,” but the cause was usually present from the start.
When You Need to Fix the Wall, Not Just the Paint
Repainting alone won’t help if you notice:
- bubbling returns repeatedly
- damp or musty smell
- wall feels cold to the touch
- visible moisture stains
In these cases, the wall itself needs to dry or be repaired before repainting.
How to Fix Bubbling Paint Properly
No risky DIY steps — just the correct logic:
- Let the wall dry completely
- Remove bubbled or loose paint
- Identify and eliminate the moisture source
- Prime the surface correctly
- Repaint under proper conditions
In most cases, fixing the cause matters more than fixing the paint.
How to Prevent Paint Bubbling in the Future
To avoid this problem next time:
- ensure walls are fully dry
- always use the right primer
- paint in moderate temperature and humidity
- ventilate rooms well during and after painting
- allow proper drying time between coats
In most cases, these steps prevent bubbling paint on walls entirely.
FAQ
Is paint bubbling after repainting normal?
Yes. It’s very common after repainting, especially when moisture or drying conditions are involved.
Can moisture cause paint bubbles on walls?
Absolutely. Moisture is the most common cause of paint bubbling.
Should I repaint over bubbling paint?
No. Always fix the cause first, or the bubbling will return.
How long should walls dry before repainting?
Usually 24–48 hours, but longer if humidity or moisture was present.
Will paint bubbles go away on their own?
No. Bubbles won’t flatten permanently without correcting the underlying issue.
Final thoughts
If after repainting walls paint started bubbling, it’s usually a signal — not a disaster. In most cases, the issue is related to moisture, surface prep, or drying conditions and can be corrected without major repairs.
Understanding why it happened is the key to fixing it once — and preventing it from happening again.